Assembly Instructions
1. Pick a size for your Y-maze, with an arm length of *N* number of panels (each panel == 8 cm).
2. Print out all parts listed in the sidebar based on the size of your Y-maze.
(how to 3D print)
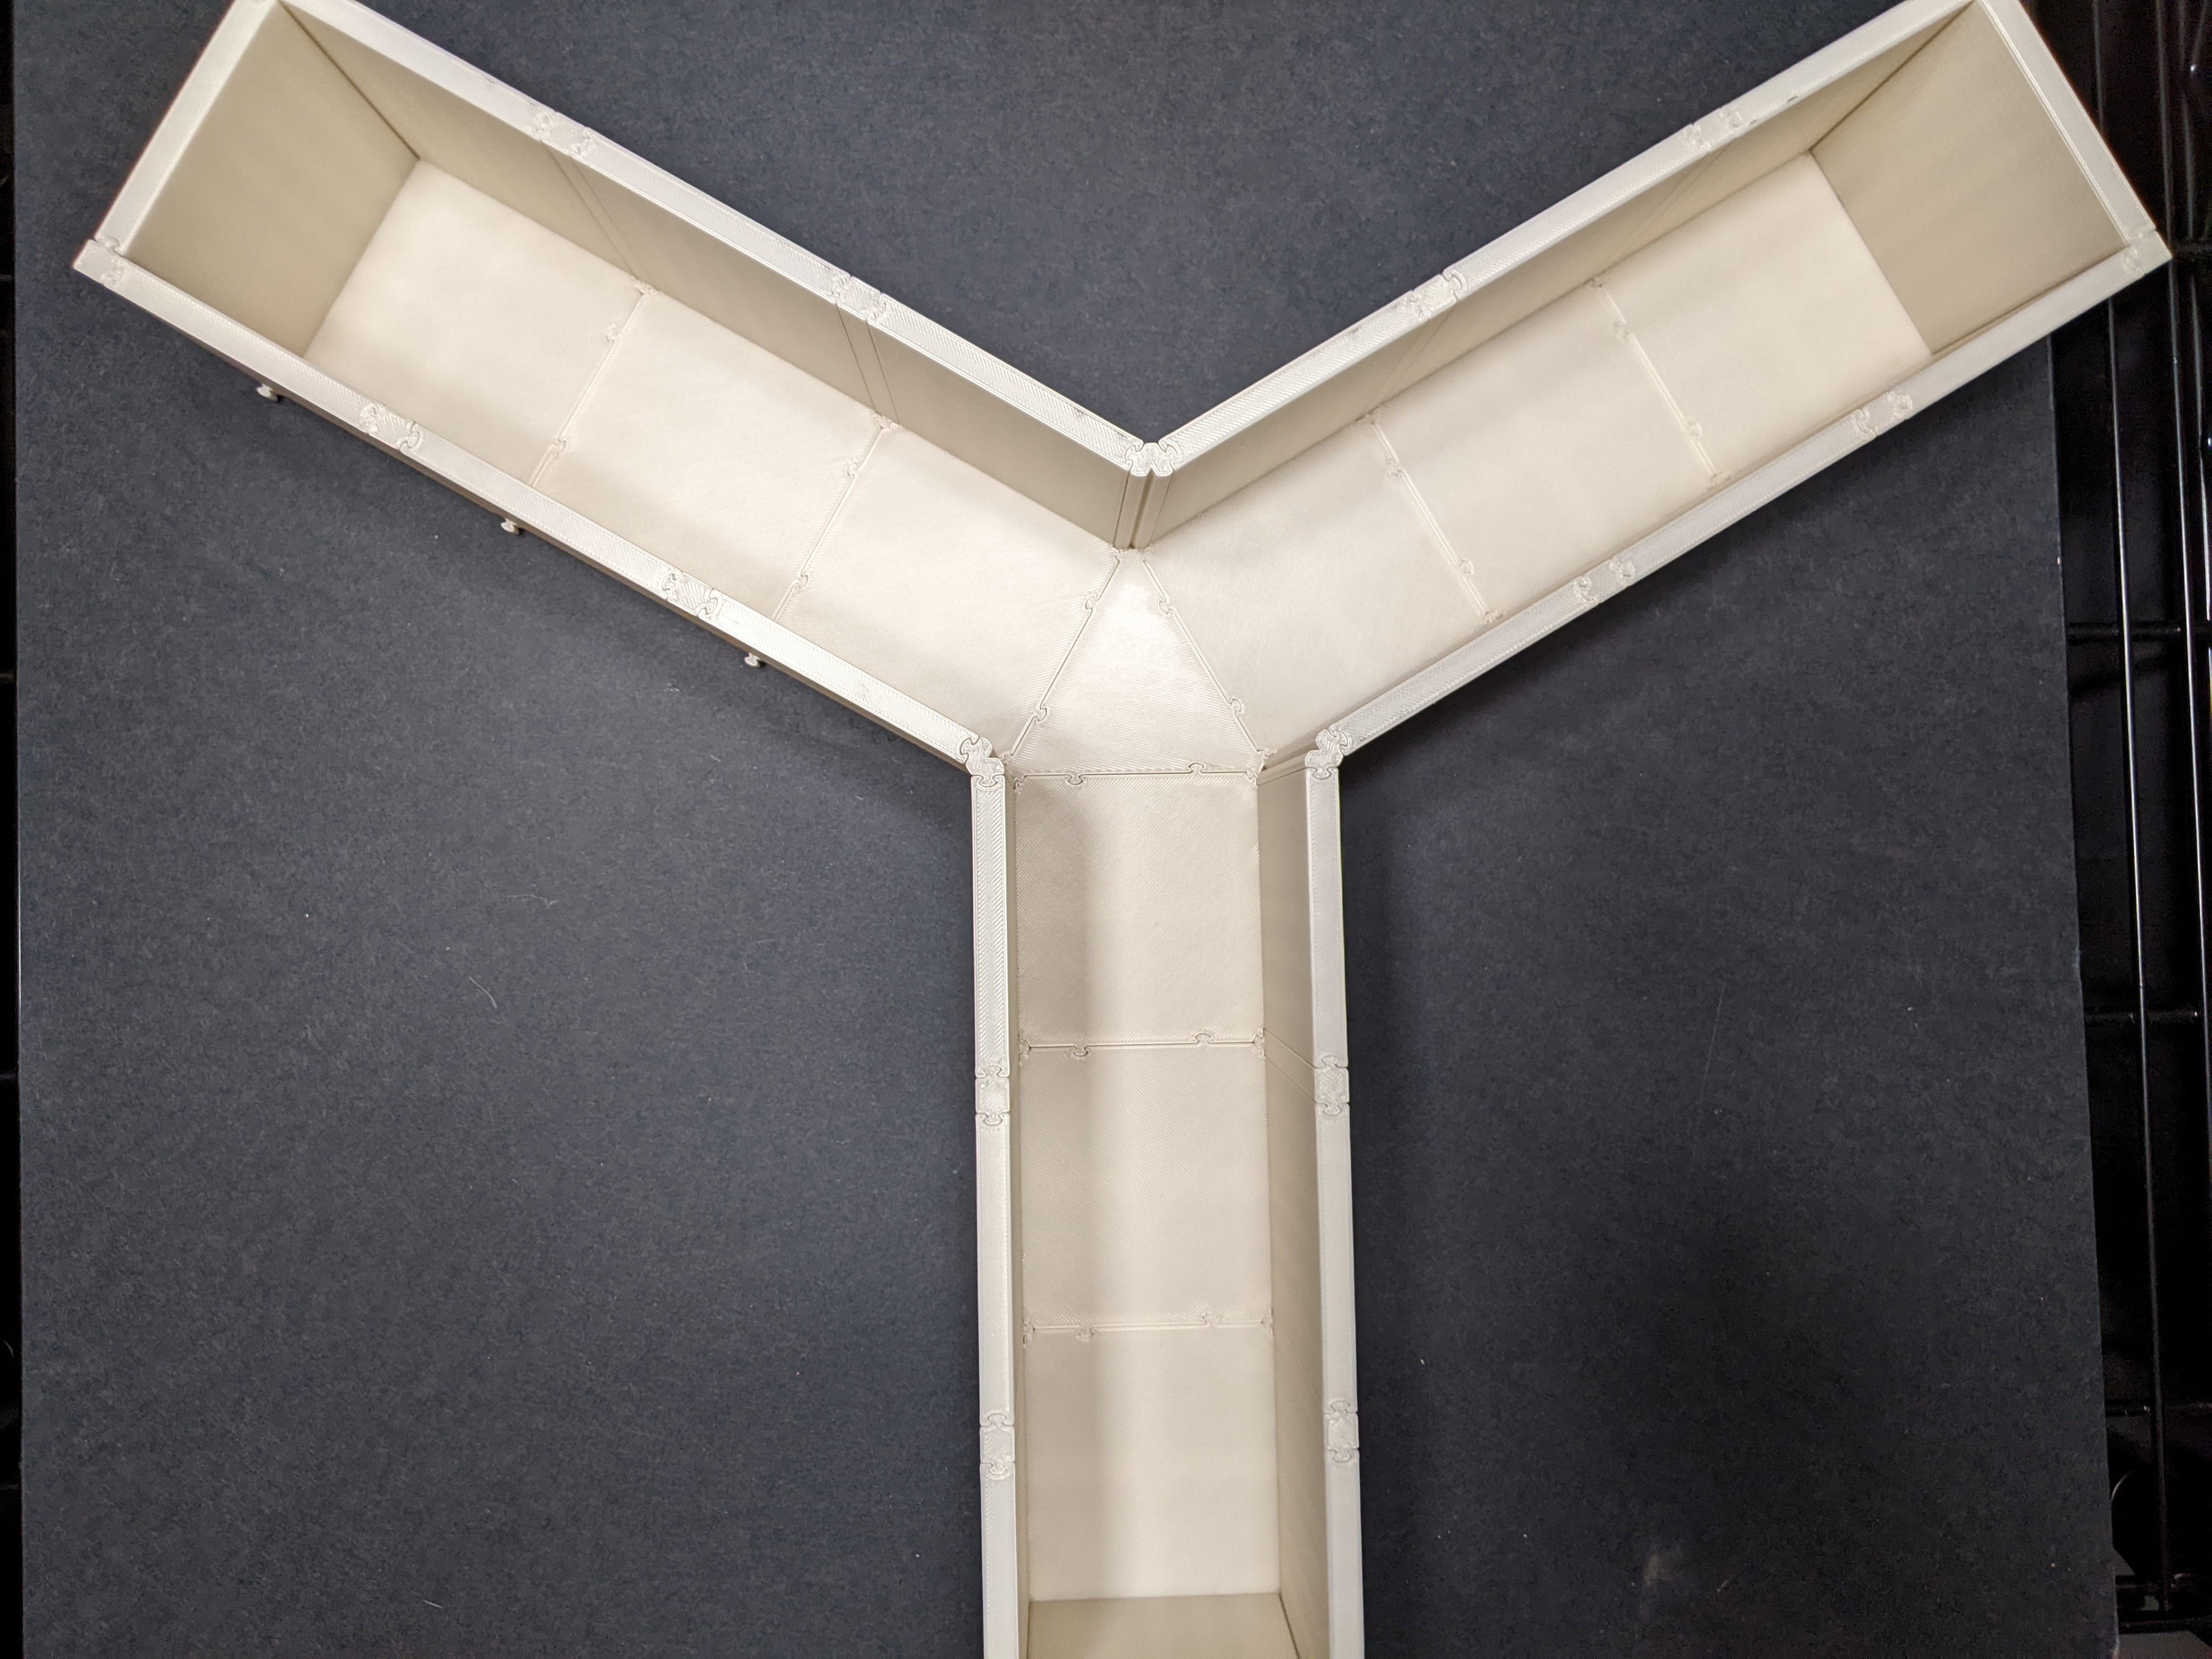
3. Place the triangle floor panel in the center, and attach 4 floor panels to each side of the triangle.
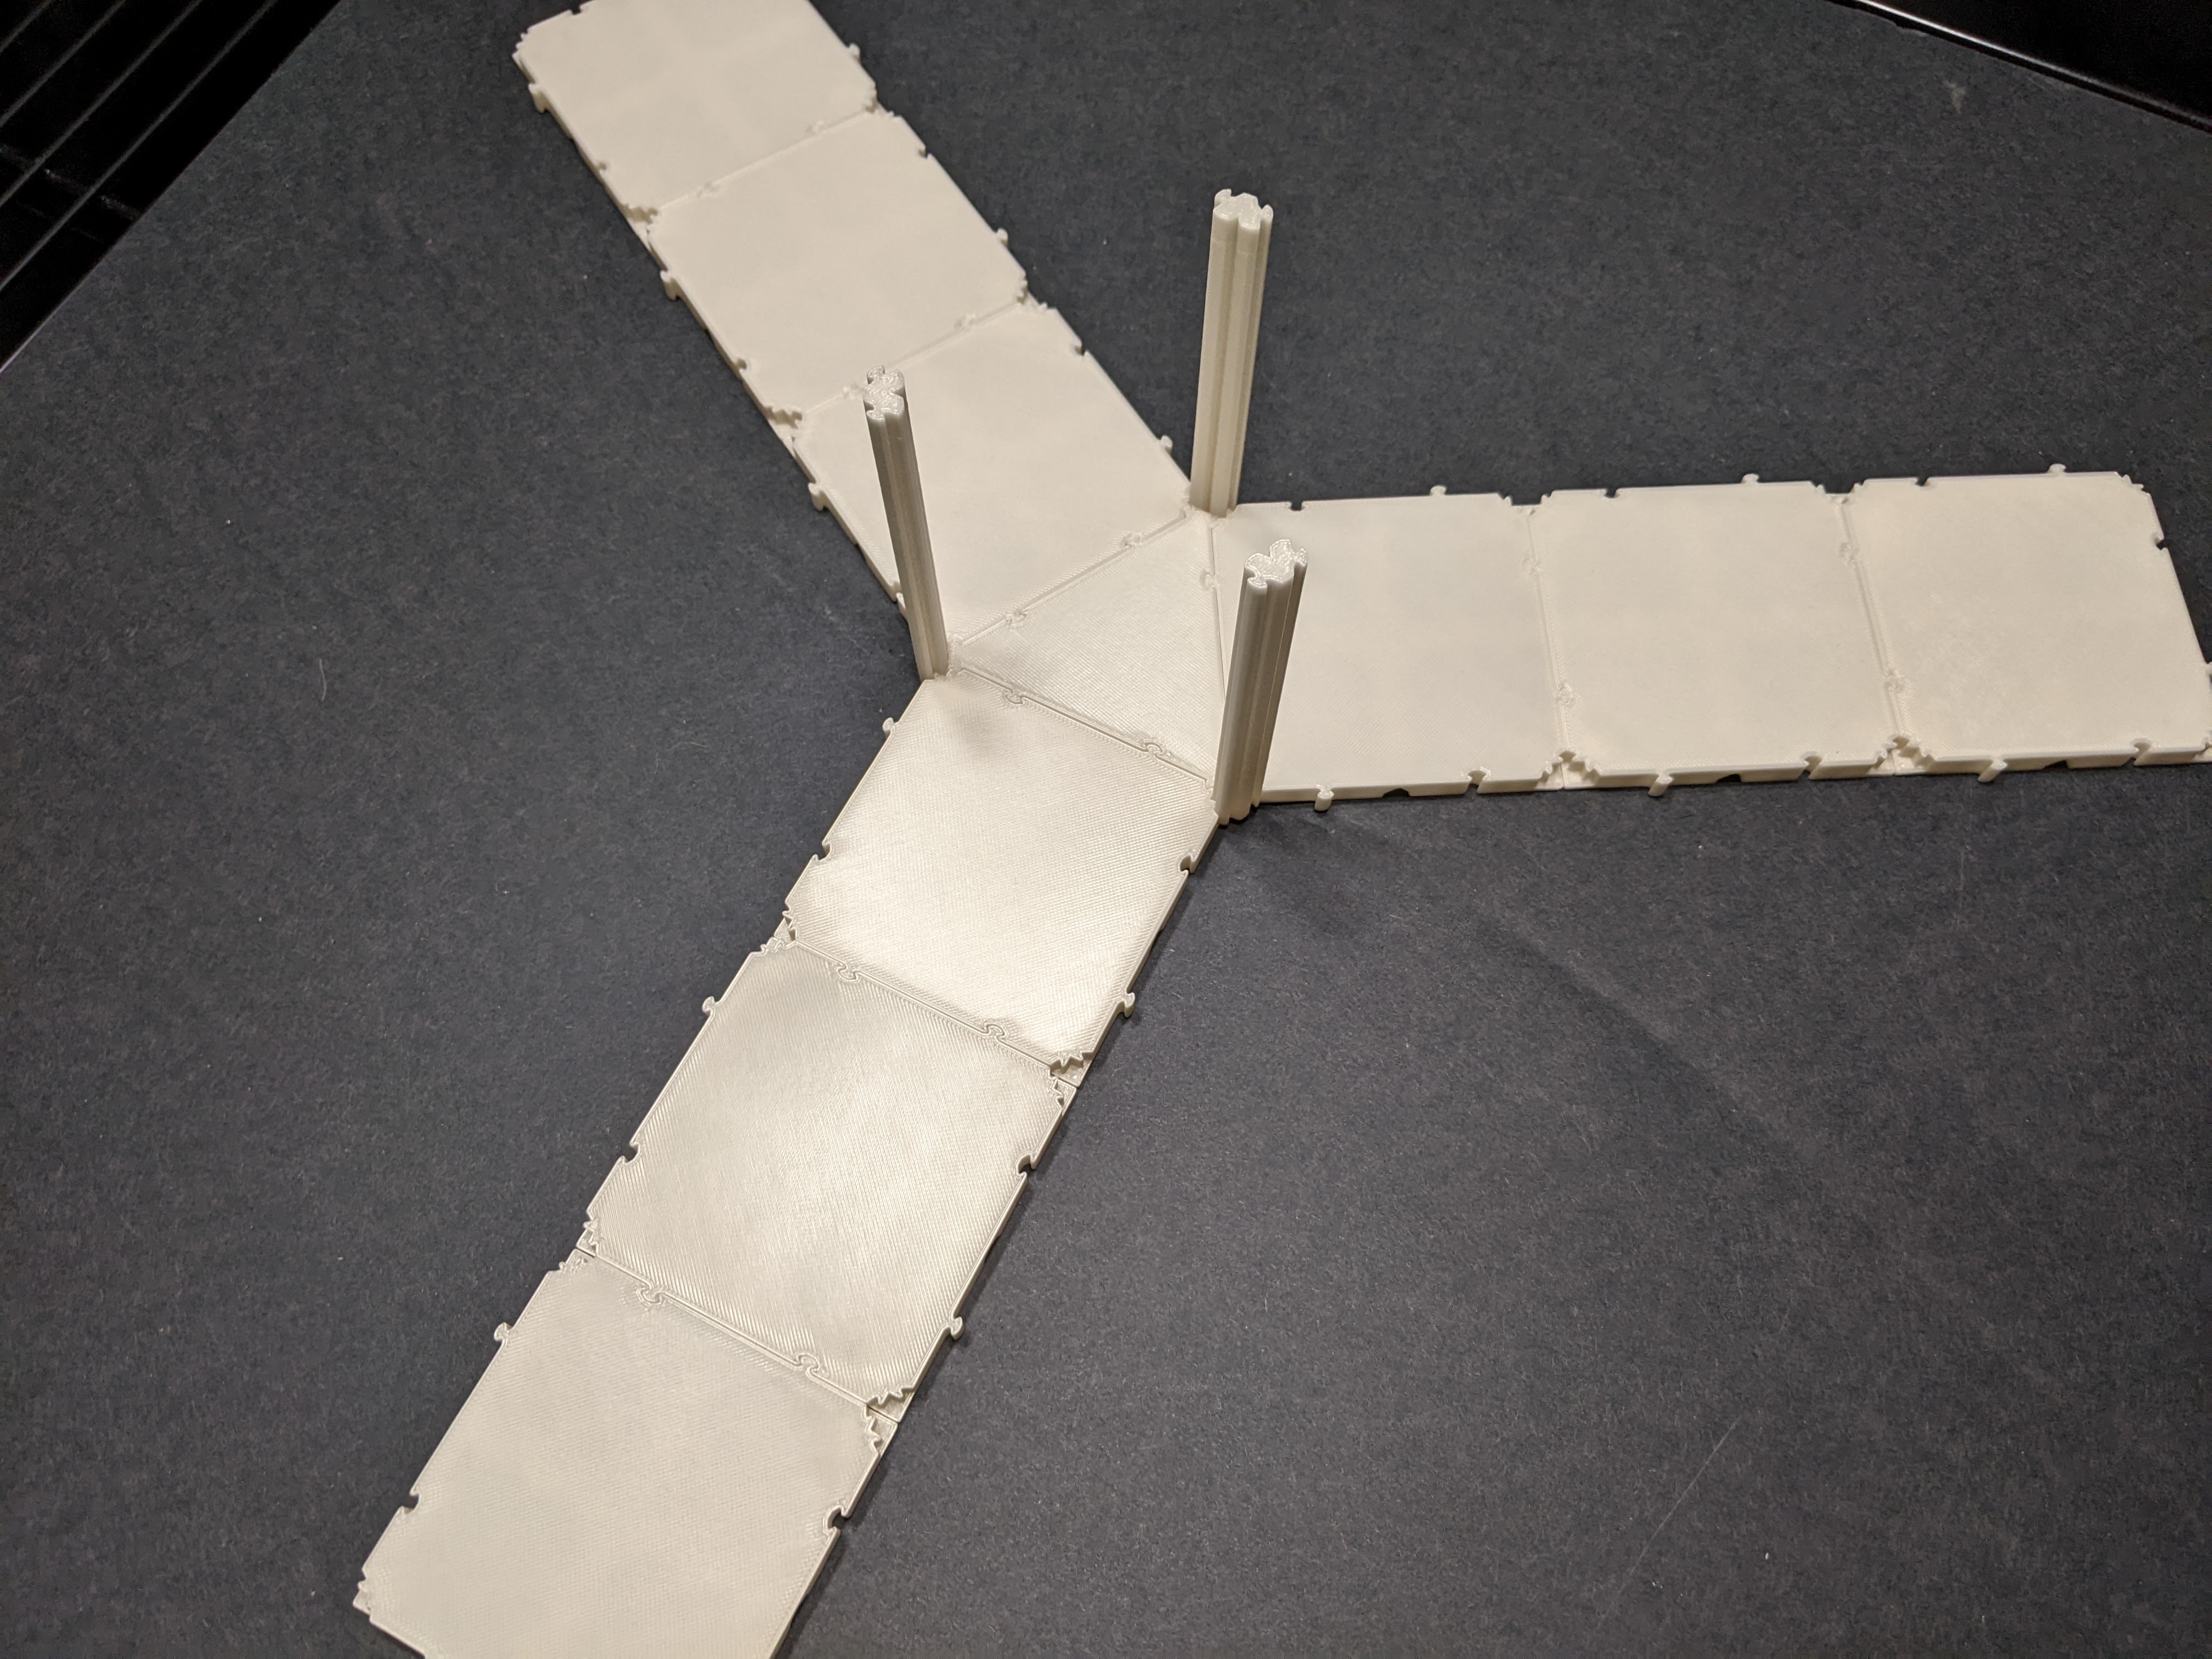
4. Attach straight junctions to the sides of each arm (but not the corner junctions yet).
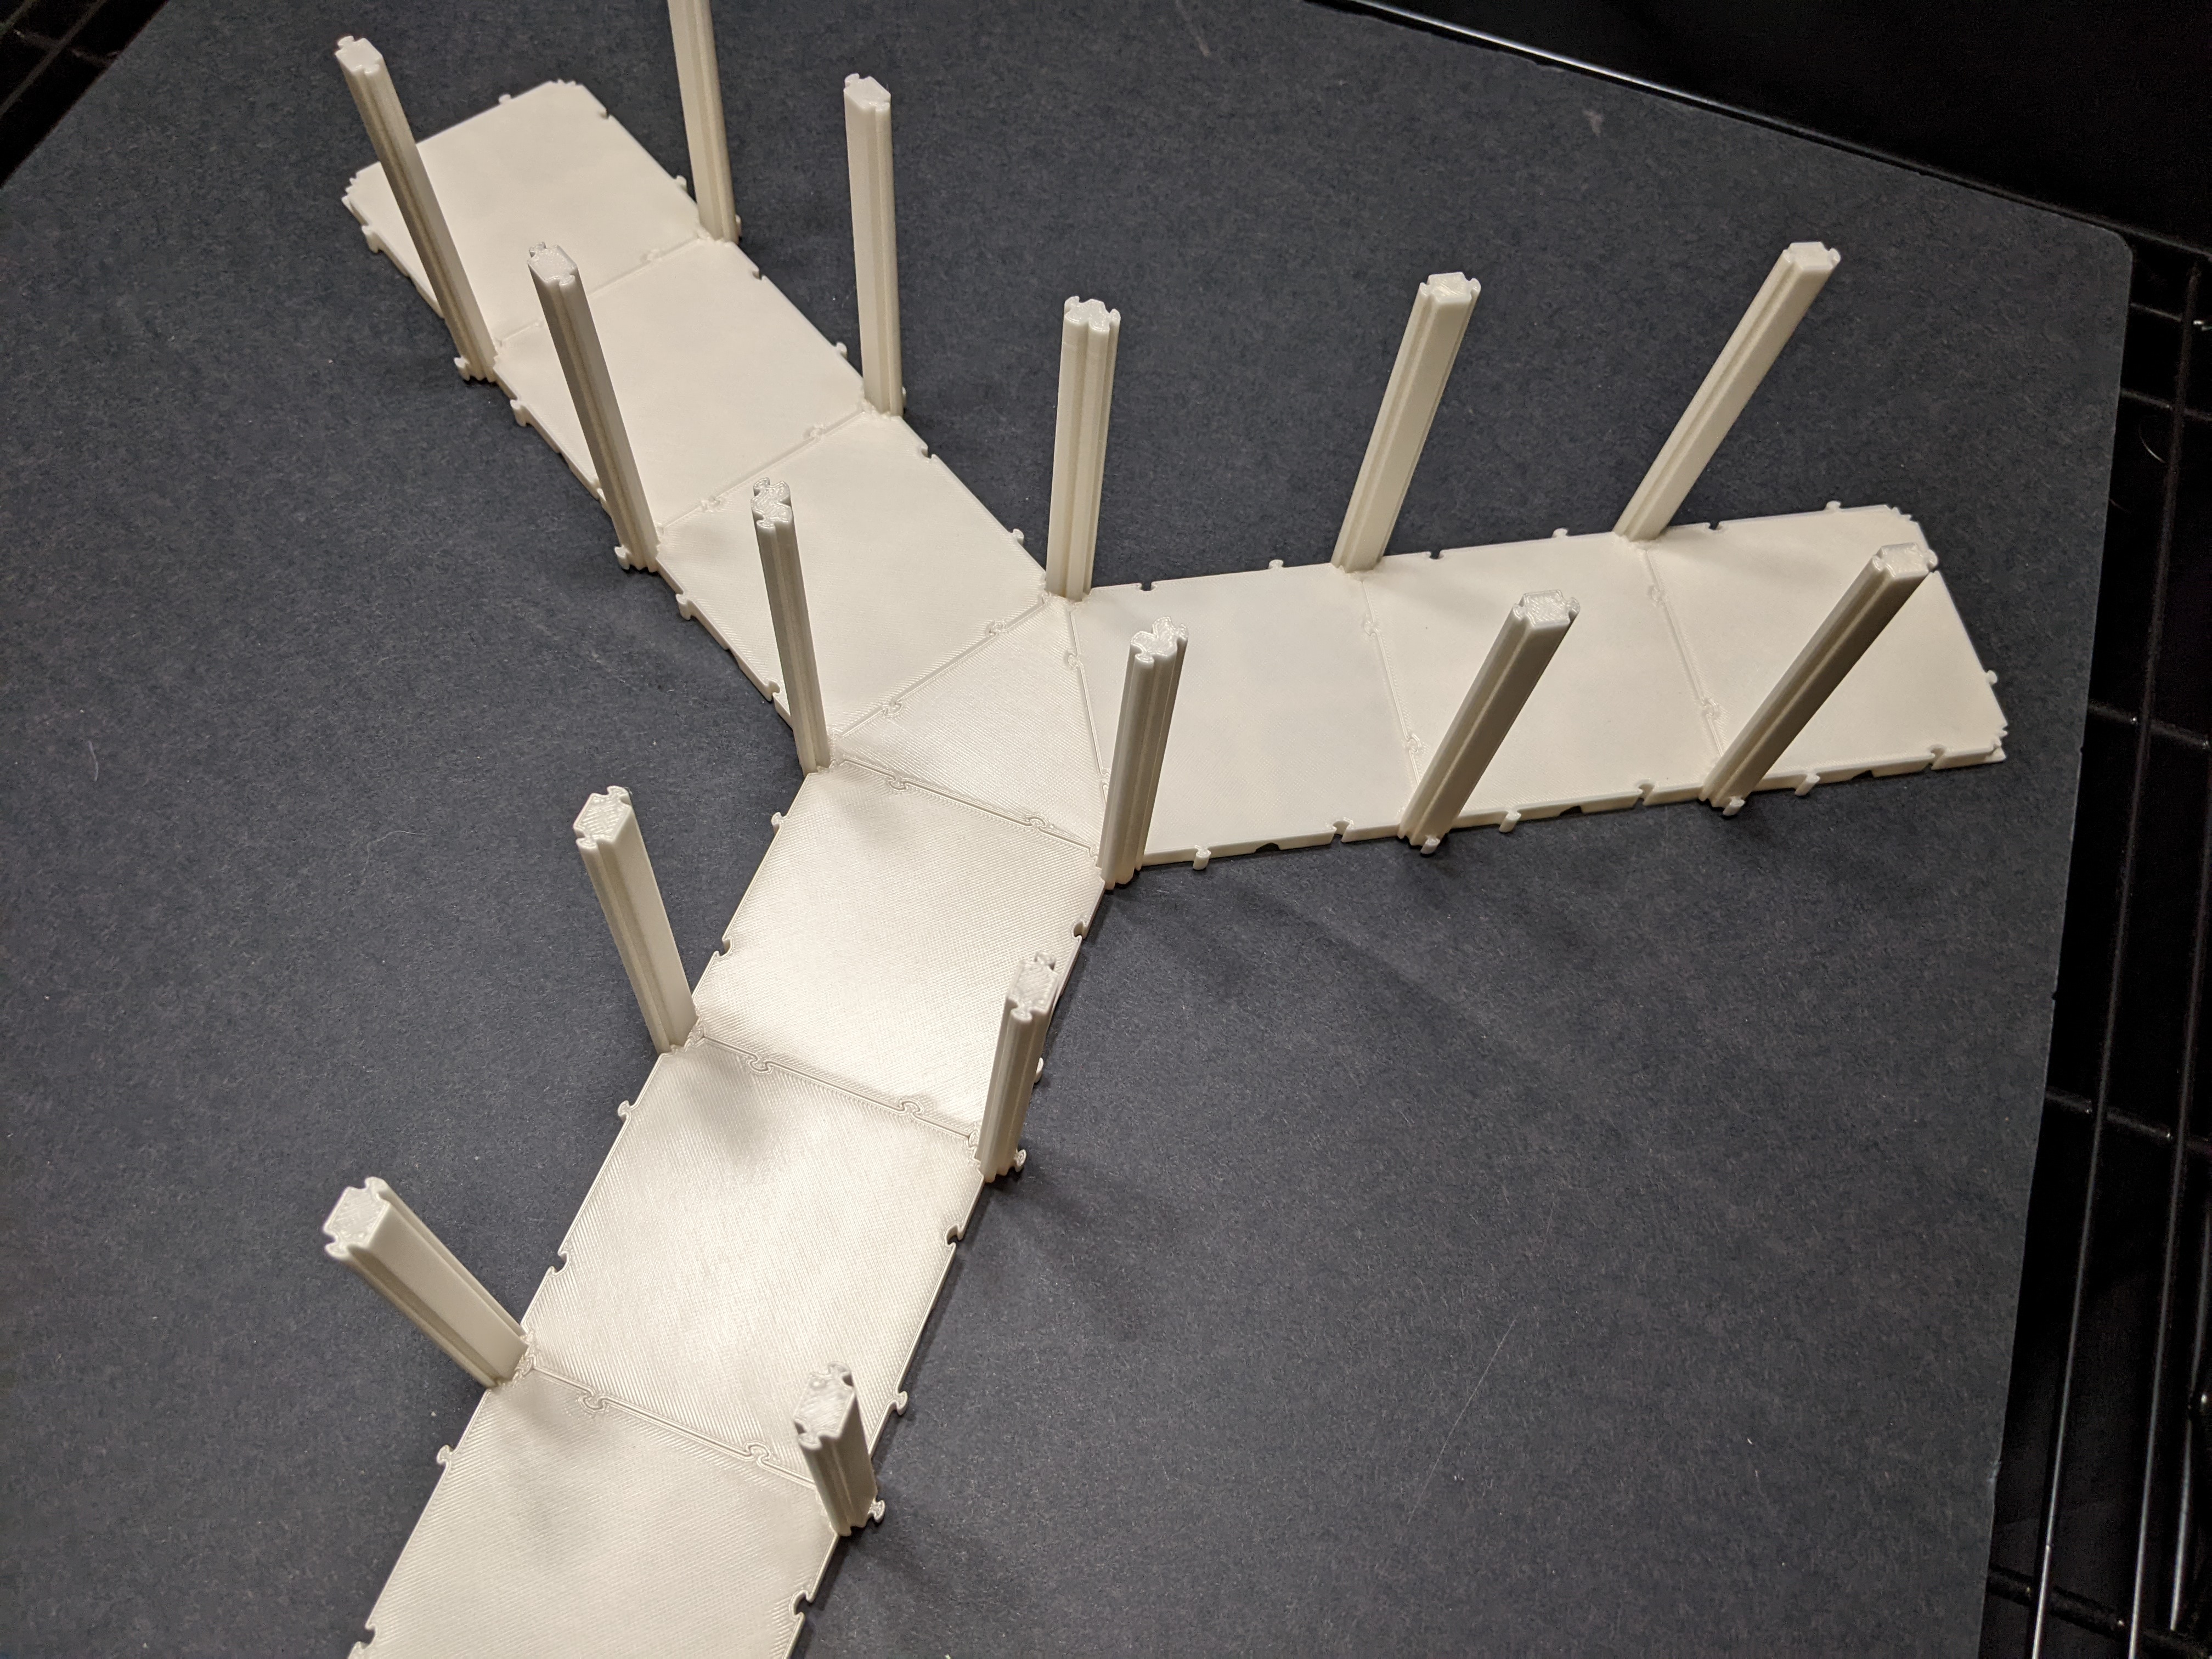
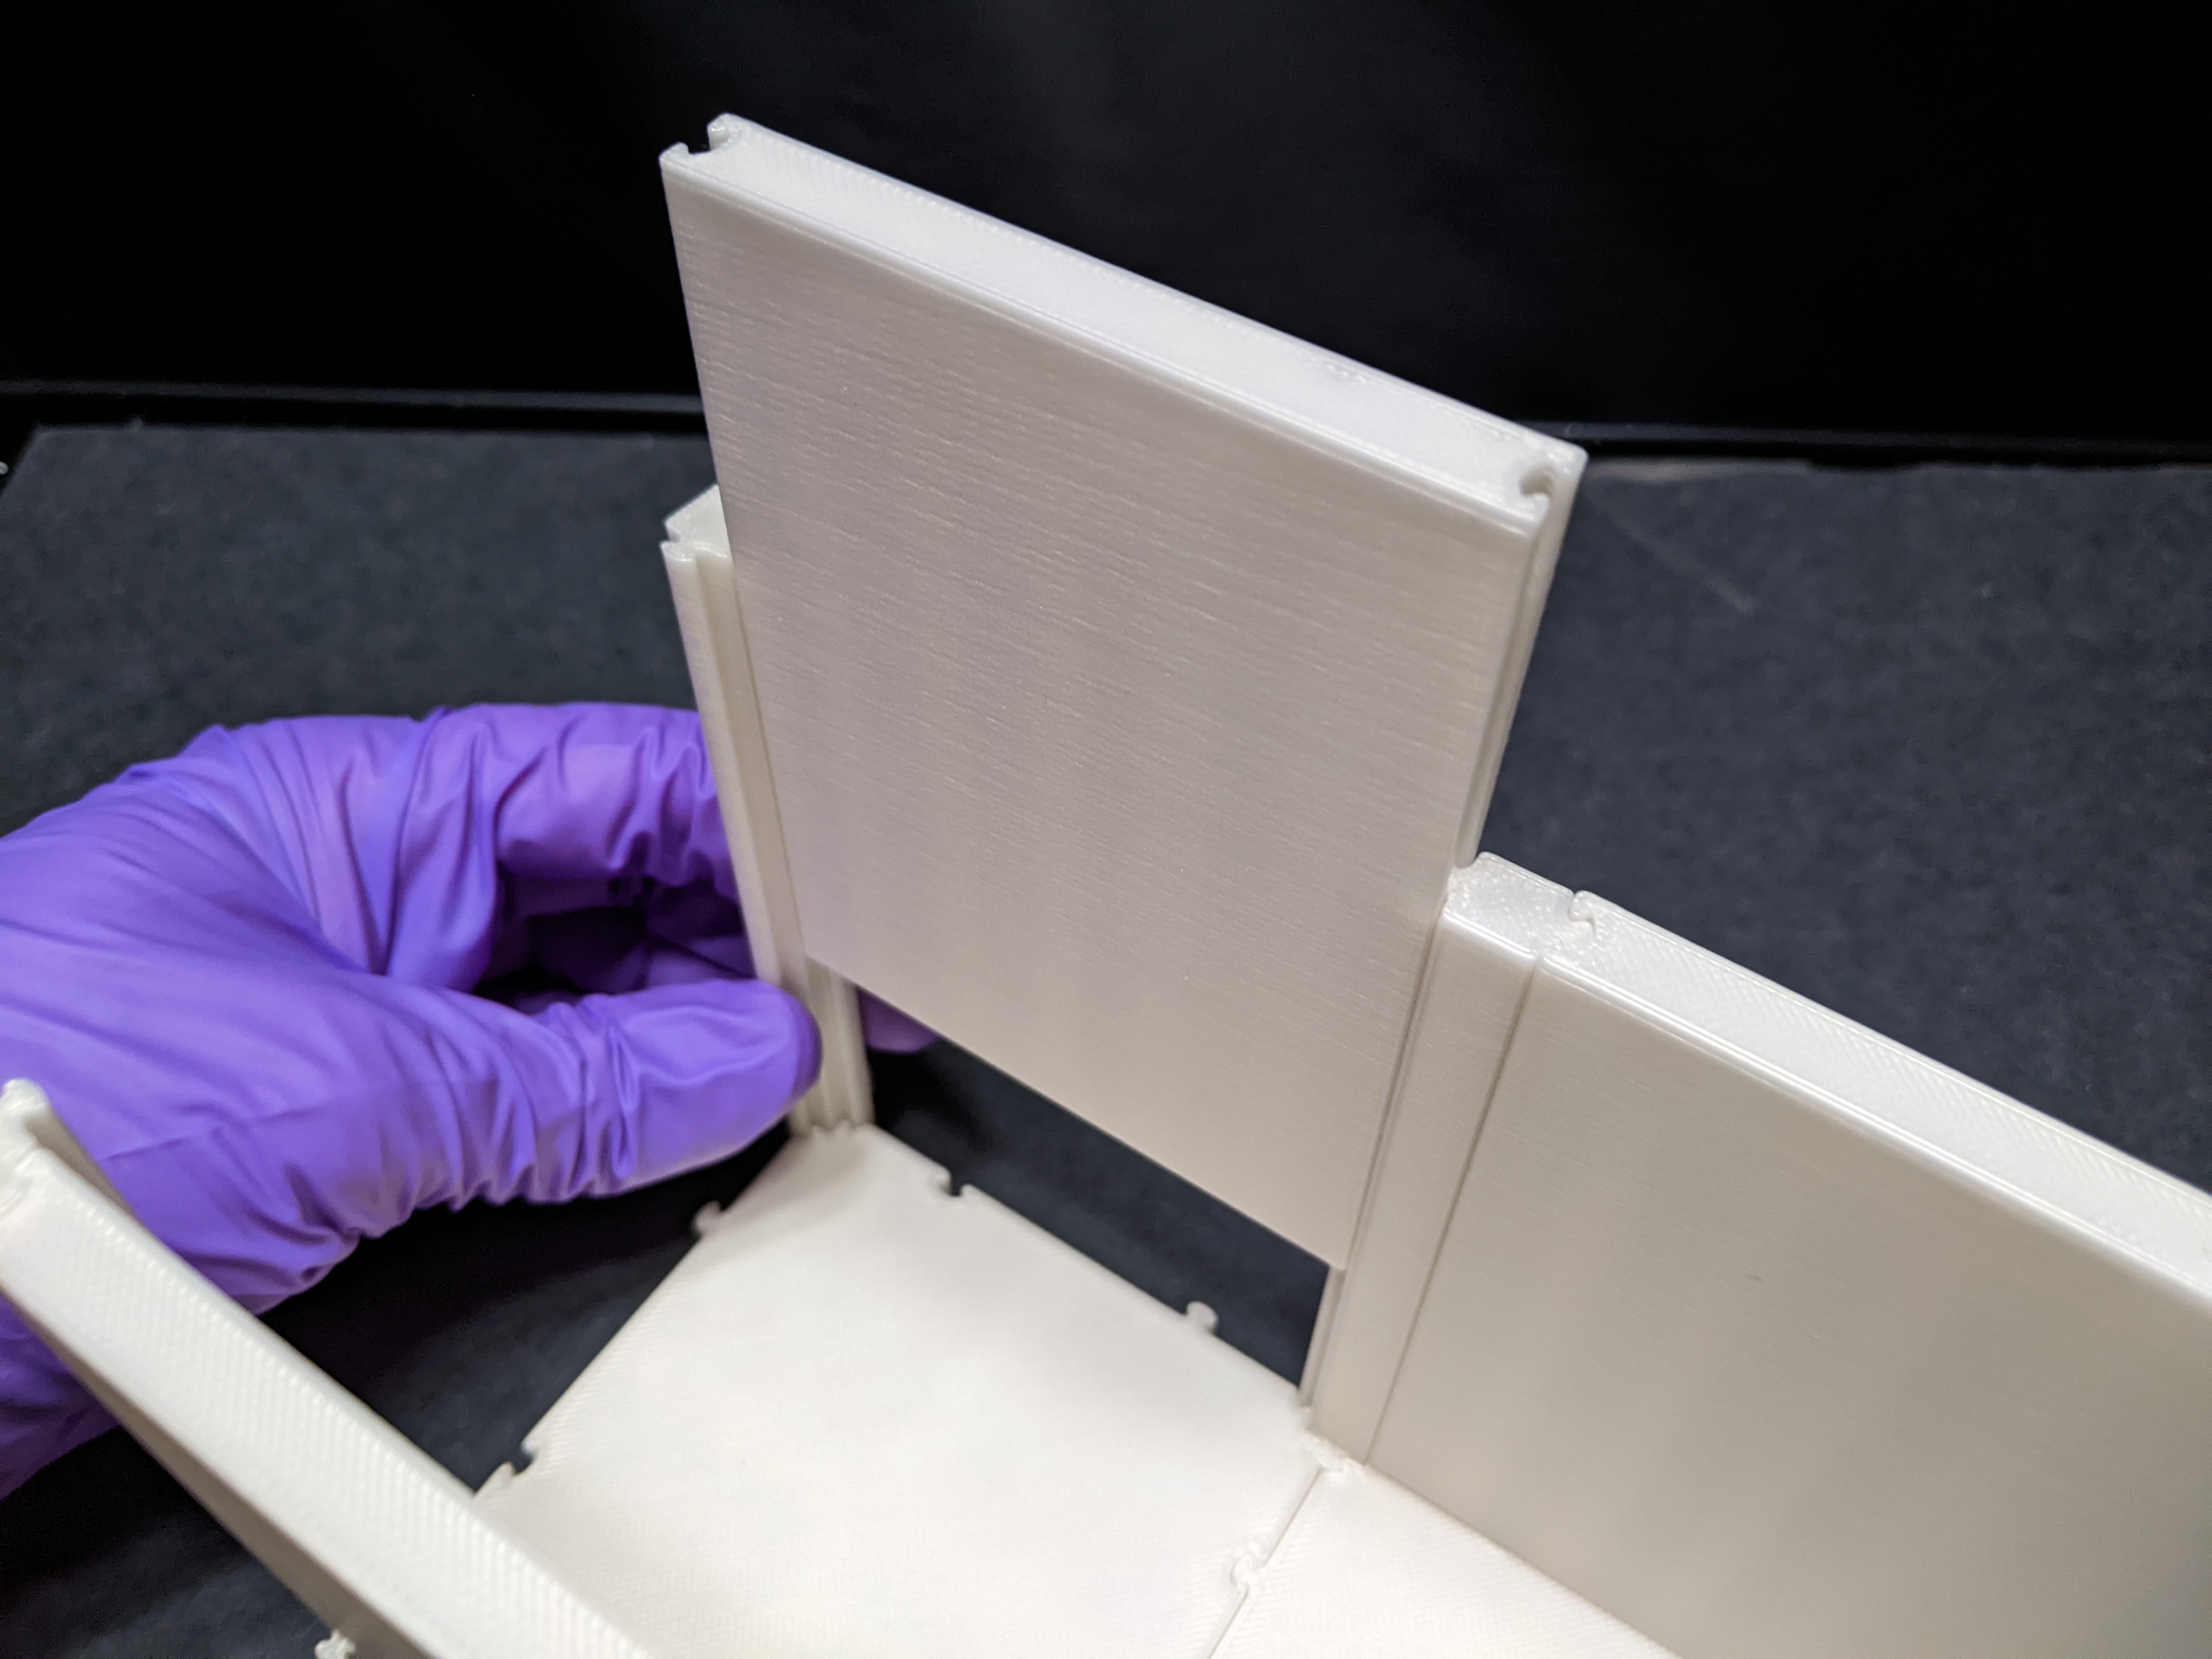
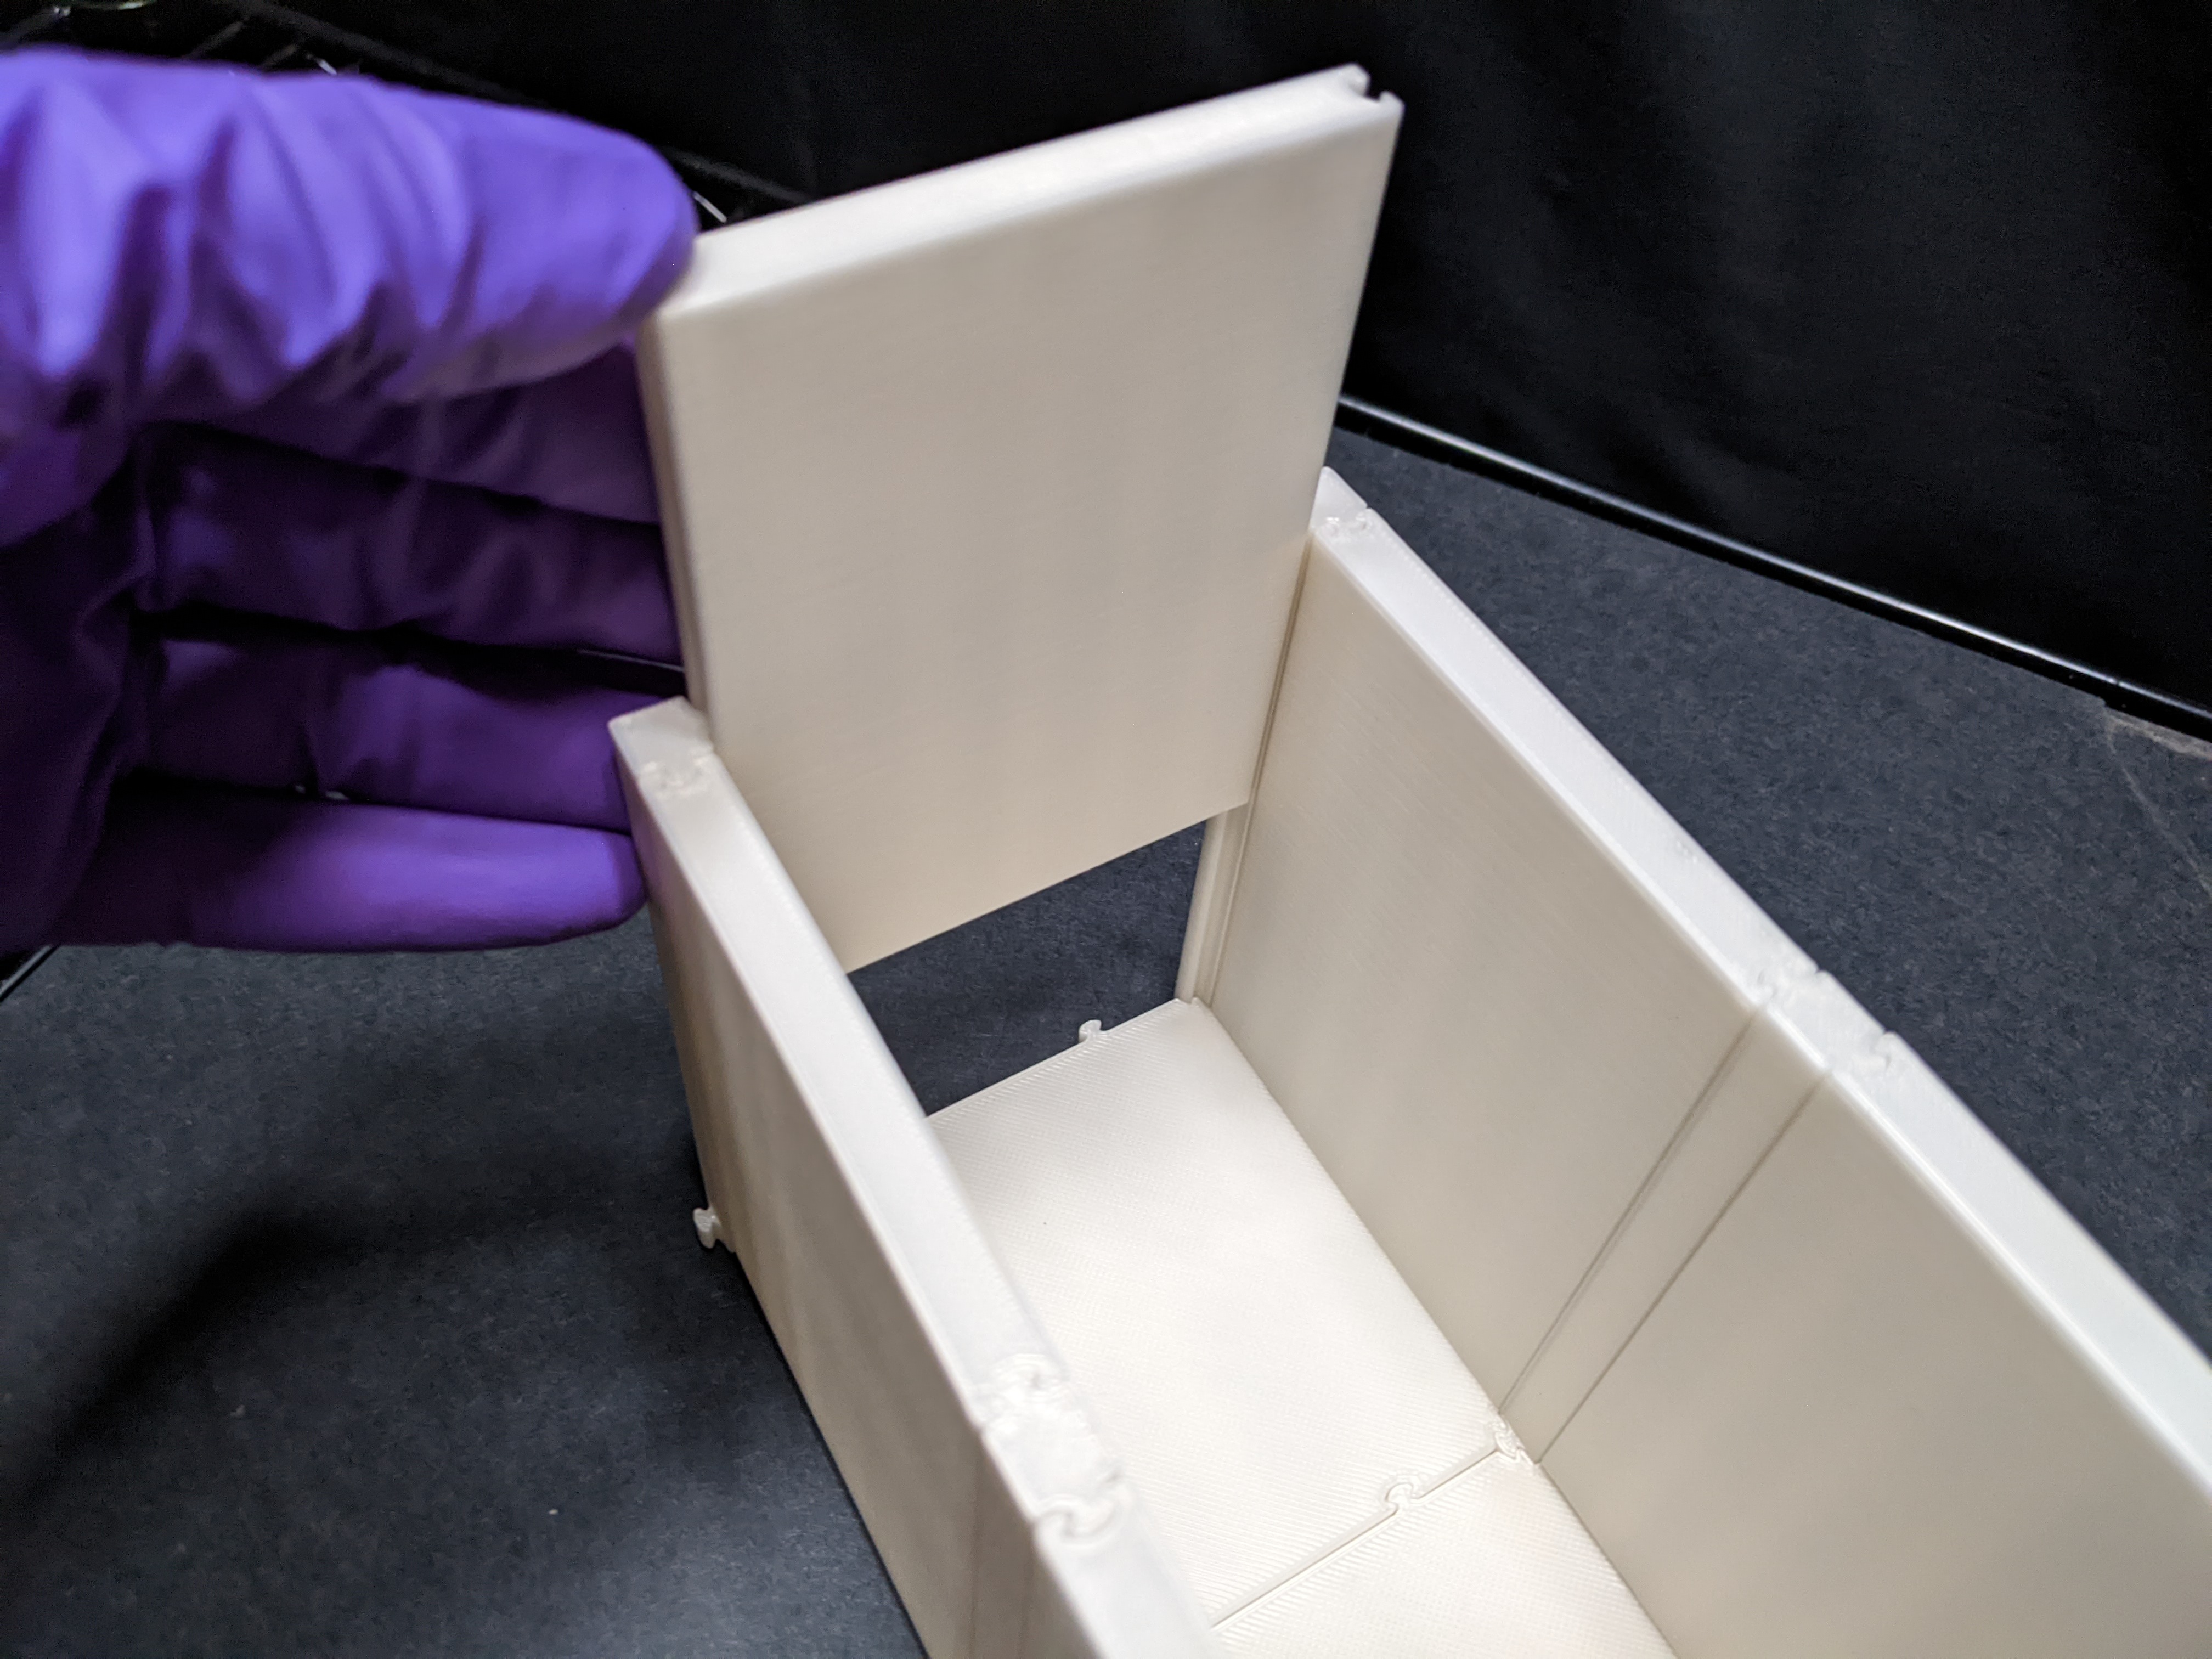
5. Slide wall panels into the attached junctions, creating the side walls of the Y-maze (but not the arm ends yet).
6. Holding a corner junction in place on an arm end, slide the final side wall panel into place. Repeat for all side walls/arms.
7. Slide the ending wall panel into place for all 3 arms.
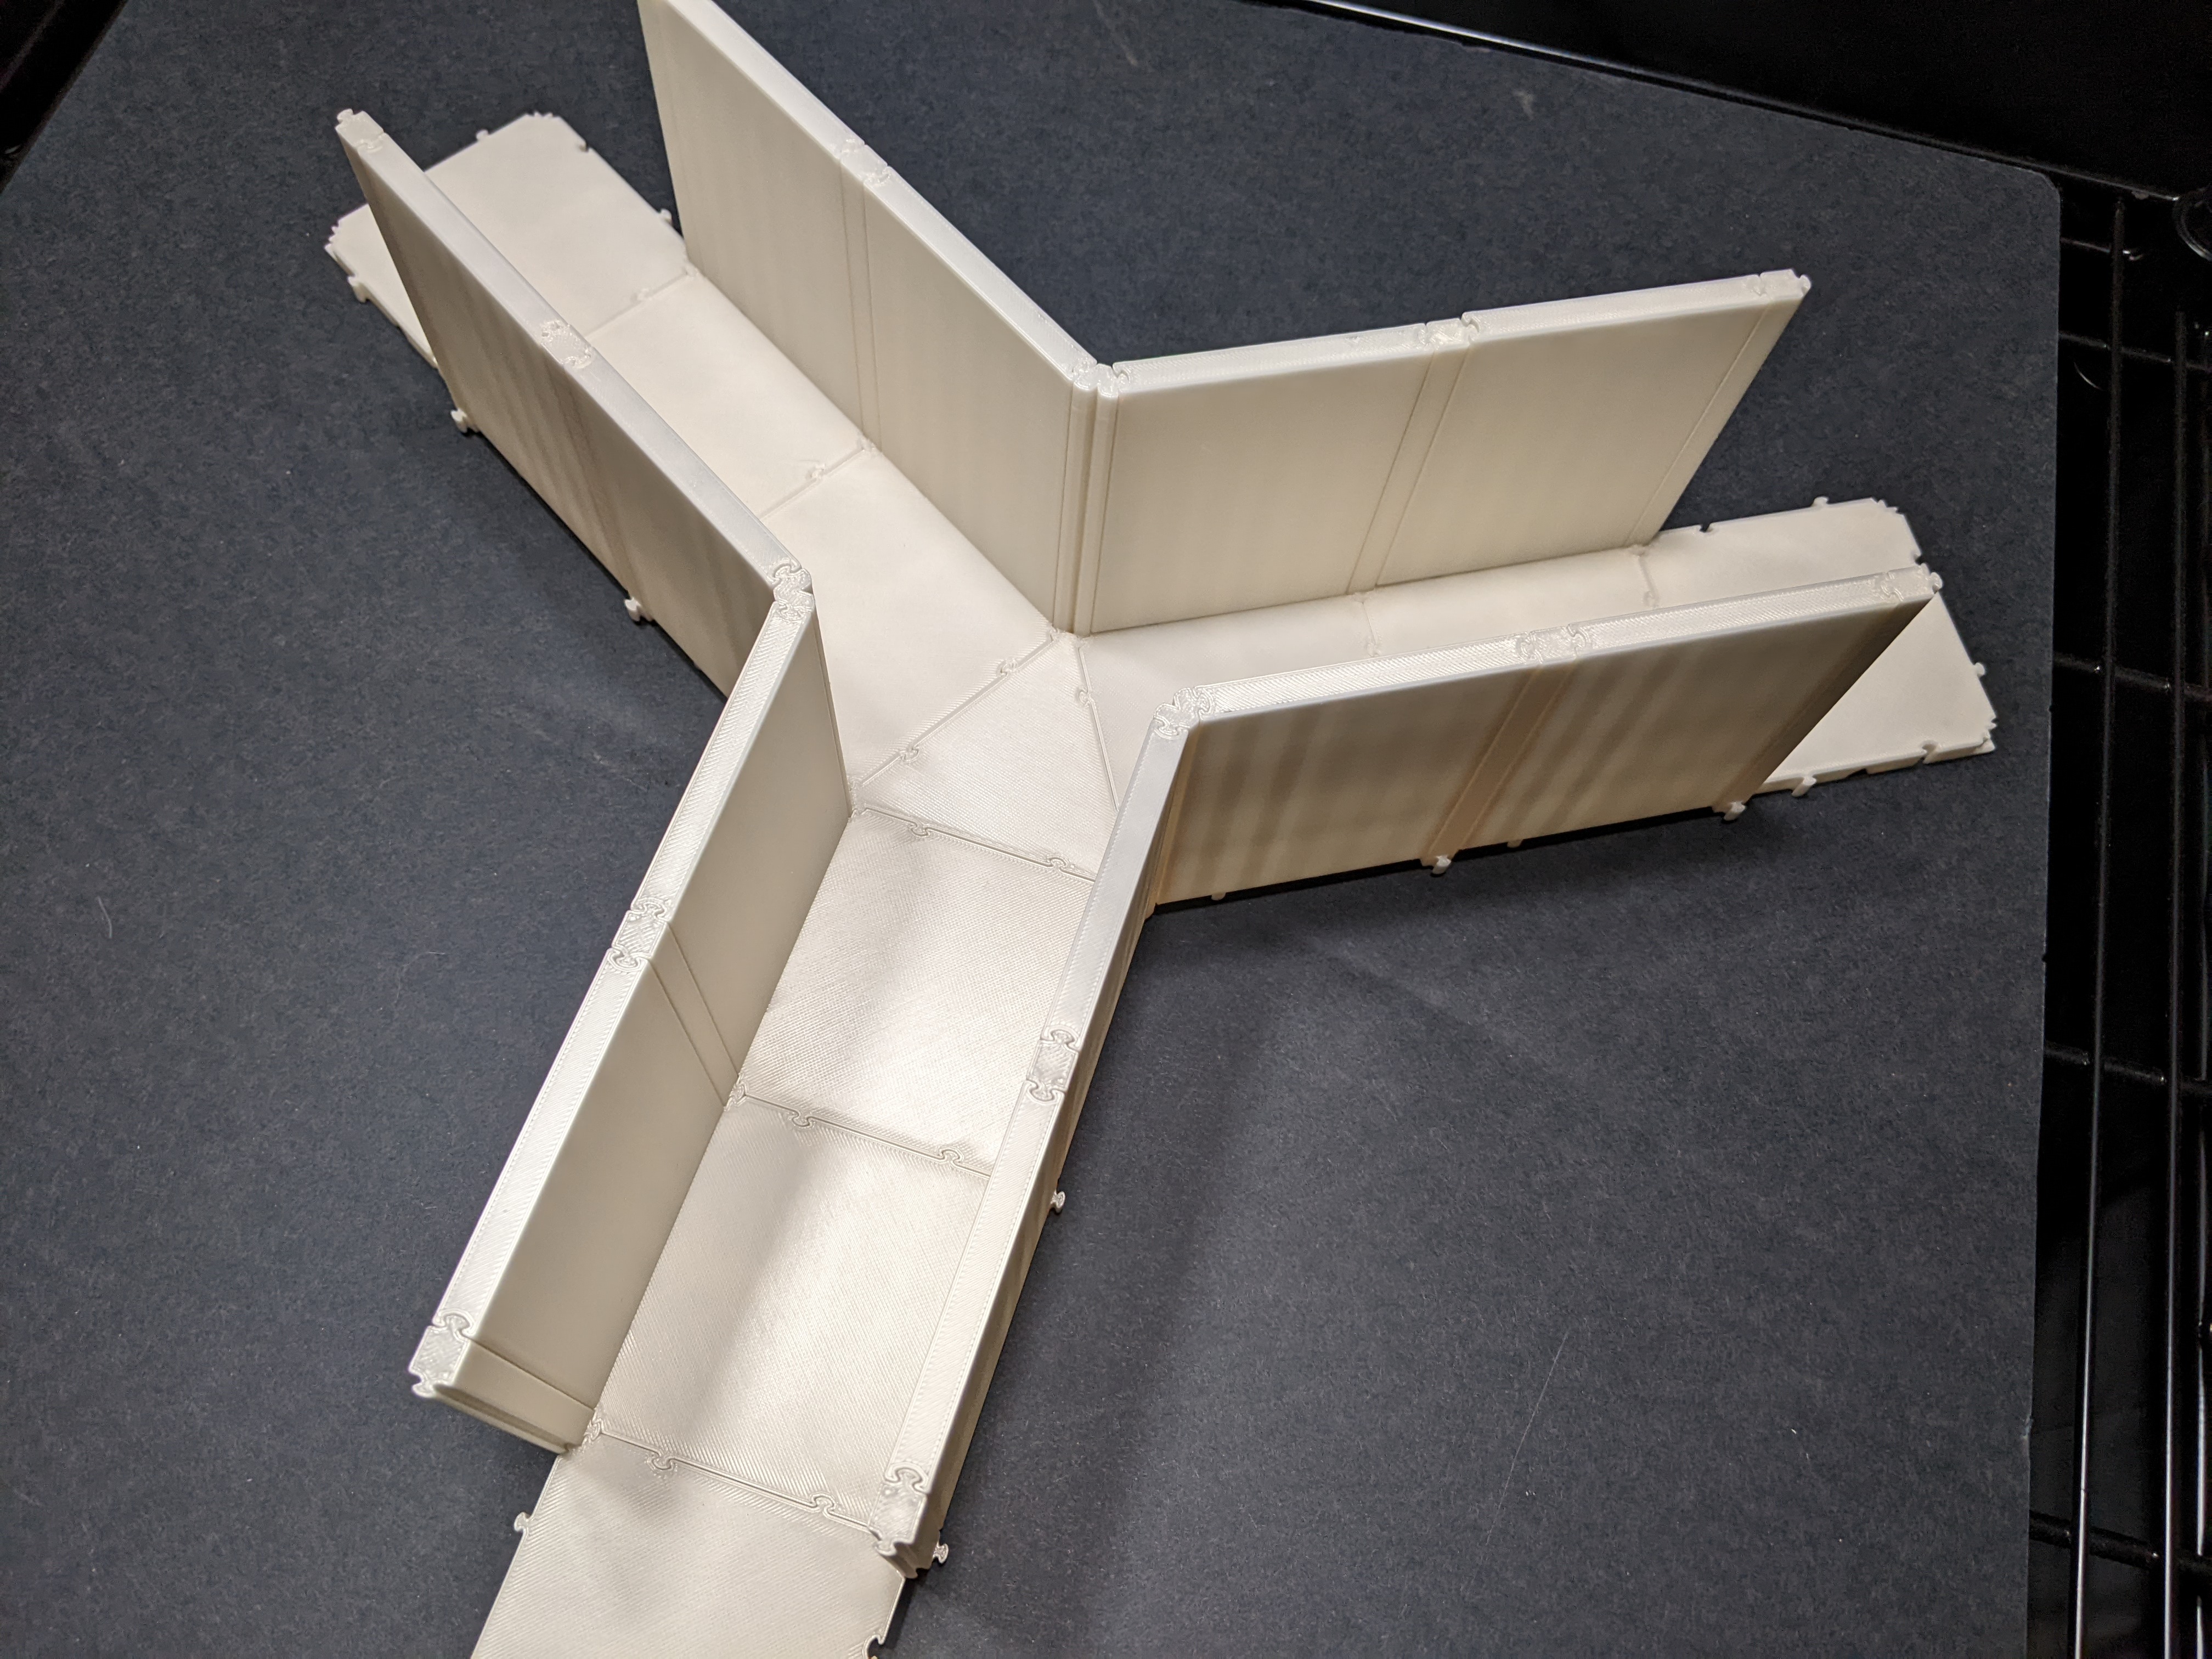
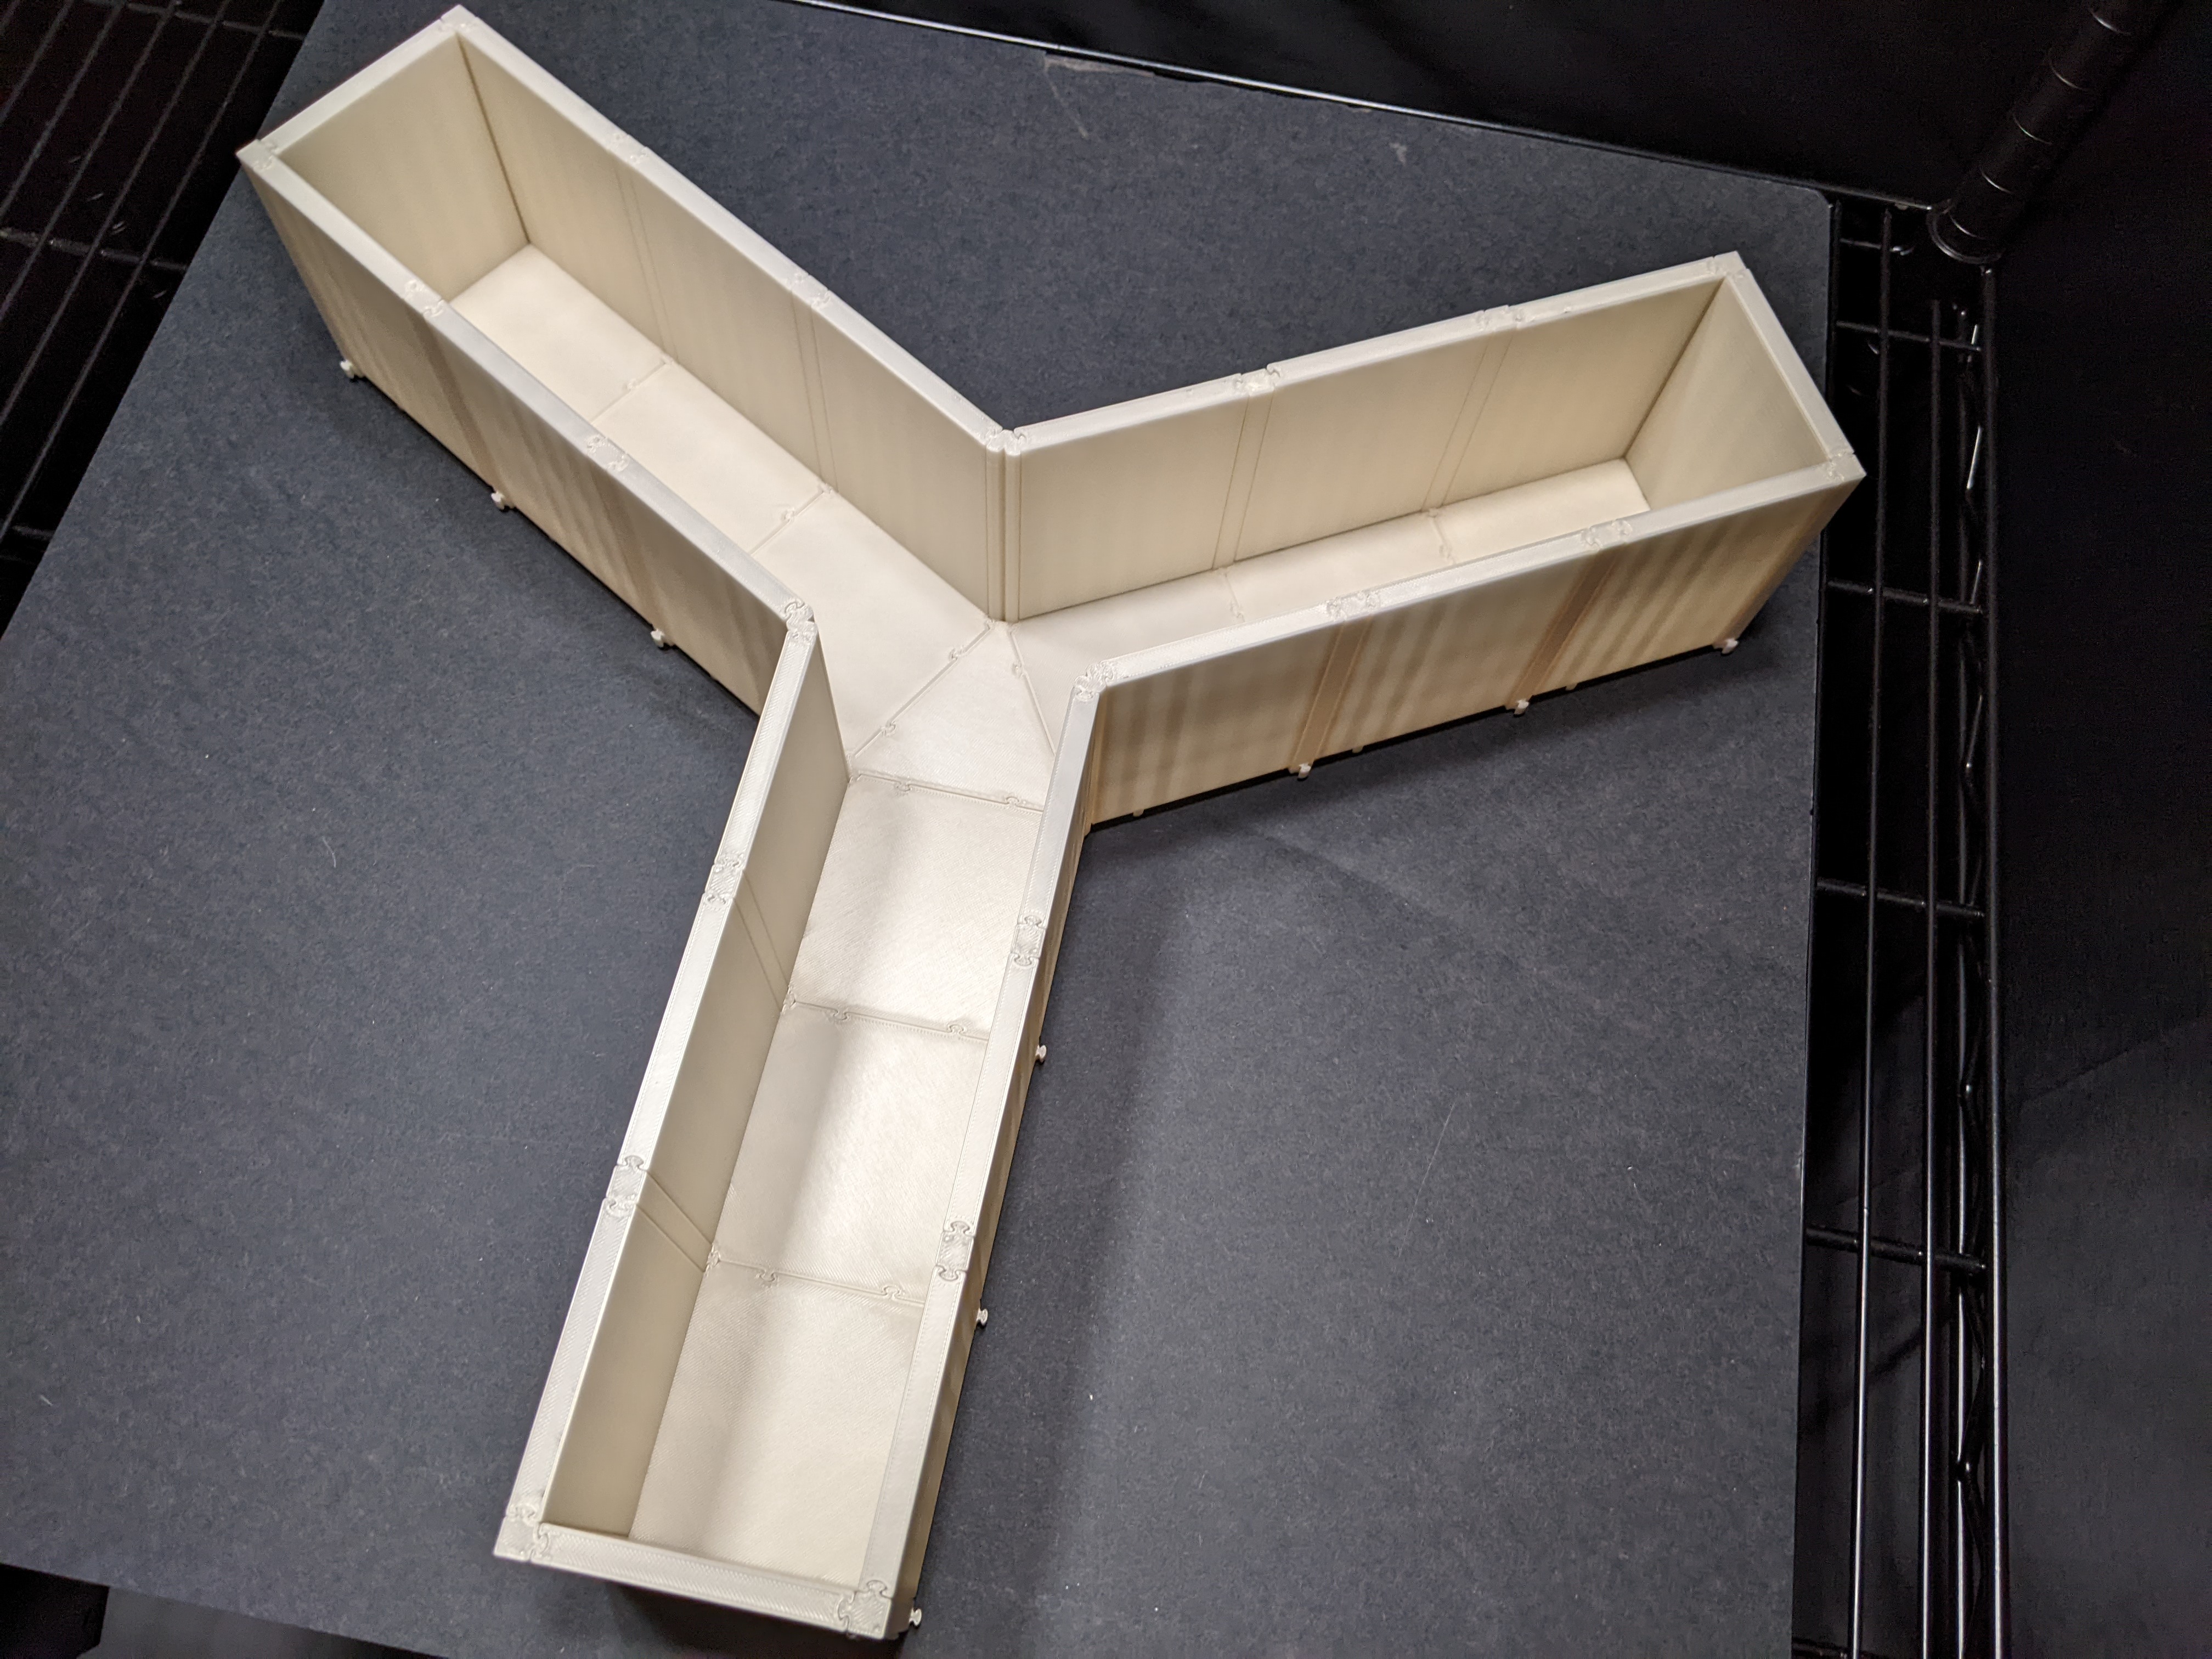
The Y-maze is now complete!
Assembled Y-maze
Parts
1 x triangle floor panel (with junctions)
3N x square floor panels
(6N)+3 x wall panels
6 x 2-way junctions (right angle)
6(N-1) x 2-way junctions (straight)